
This chapter contains the following topics:
If you are not using multi-warehousing, skip this chapter entirely, as the Warehouses selection will not be available.
If you selected multi-warehousing in I/C Control information, use this selection to designate valid warehouses. When using I/C, you can make entries only for warehouses that are defined here.
This chapter describes how to set up multiple warehouses.
Select
Warehouses from the Master Information menu.
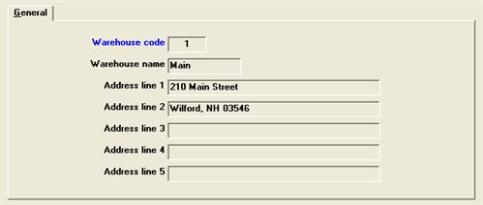
Graphical Mode
The following screen displays:
The list box displays up to 6 existing warehouses at a time. You may sort the warehouses by warehouse code in ascending or descending order. Only column names in red may be sorted. To select a field or change the sort order, click on the column name or the arrow to the right of the column name or use the View options.
To locate a warehouse, start typing the warehouse code. You may also use the up/down arrows, Page up, Page down, Home and End keys to locate a checking account. The <F1> and <SF1> keys function the same as the up/down arrow keys.
Warehouses that display in the list box are available for changes or deletion.
The fields for the warehouse selected in the list box display in the lower part of the screen.
The buttons provide the following:
| Button | Keyboard | Description |
|
New |
Alt+n |
To enter a new warehouse |
|
Edit |
Alt+e |
To edit an existing warehouse |
|
Save |
Alt+s |
To save a new warehouse or changes to an existing warehouse |
|
Save/New |
Alt+w |
To save a new warehouse and start entering a new one |
|
Delete |
Alt+d |
To delete an existing warehouse. It does the same as the <F3> key |
|
Cancel |
Alt+c |
To stop entering a new warehouse or stop editing an existing warehouse without saving the changes |
|
Exit |
Alt+x |
To exit the screen to the menu |
Character Mode
The following screen displays:
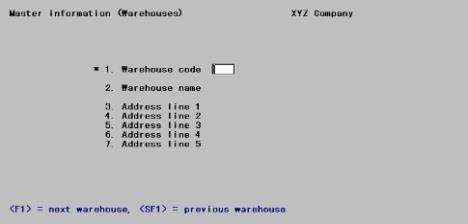
You may use one of the character mode options:
|
<F1> |
To scan through the warehouses |
|
<SF1> |
To scan through previous warehouses |
|
<F3> |
To delete an existing warehouse |
Options
Enter a warehouse code, or in character mode use the option:
|
<Enter> |
To designate this warehouse as the “Central” warehouse |
|
<F1> |
To scan through the warehouses |
|
Note |
If you designate a “Central” warehouse, you are able to default to it by pressing <Enter> during many I/C selections. Otherwise, you have to enter a warehouse code in those selections. |
Enter a name that describes the warehouse.
Enter the address lines for the warehouse. The first line of the address is usually your company name.
|
Format |
Enter information for a second warehouse as shown on the screen below, so that you will have a second warehouse to transfer items into in a later example. |
Select
Warehouses from the Reports, master info menu.
The Printer Selection screen will be displayed. Select the printer that you want use for this list, elect to print the Warehouse List to disk or display on your screen.
All warehouses will be printed on the Warehouse List.